
Interactive timelines are such a versatile tool for your classroom. Whether you have 1:1 iPads or are visiting the computer lab there is a way to use interactive timelines with your students.
Here are some ways to use interactive timelines in the classroom
- Timeline of an event or topic. Jess Thompson's students are just wrapping up their Revolutionary War timelines that highlight key people and events in the American Revolution
- Process Journals. Use a timeline to reflect on your unit, project, or school year. Have students enter reflections daily or weekly and see the growth of the reflections over time
- Timeline of a unit, skill, or project. Have students chart their catalog their learning or understanding of a concept or project and see how they have grown over time
- Chart the journey of a character through a book or novel
- Biography
With the right tool creating timelines with students is super easy... and engaging!
Our favorite story telling tools come from Knightlabs. They offer two really cool tools for making digital timelines. The first is their Timeline JS tool. It is super easy to use and the backbone of the timeline is a Google spreadsheet. You can share a template with students and have them make a copy of the spreadsheet to catalog their "events" or if you are using Google Classroom even better! Just post the template into classroom to make a copy for each student and you are off running.
Here is an example timeline that displays some of the great possibilities that you can put into the timeline.
Make One!
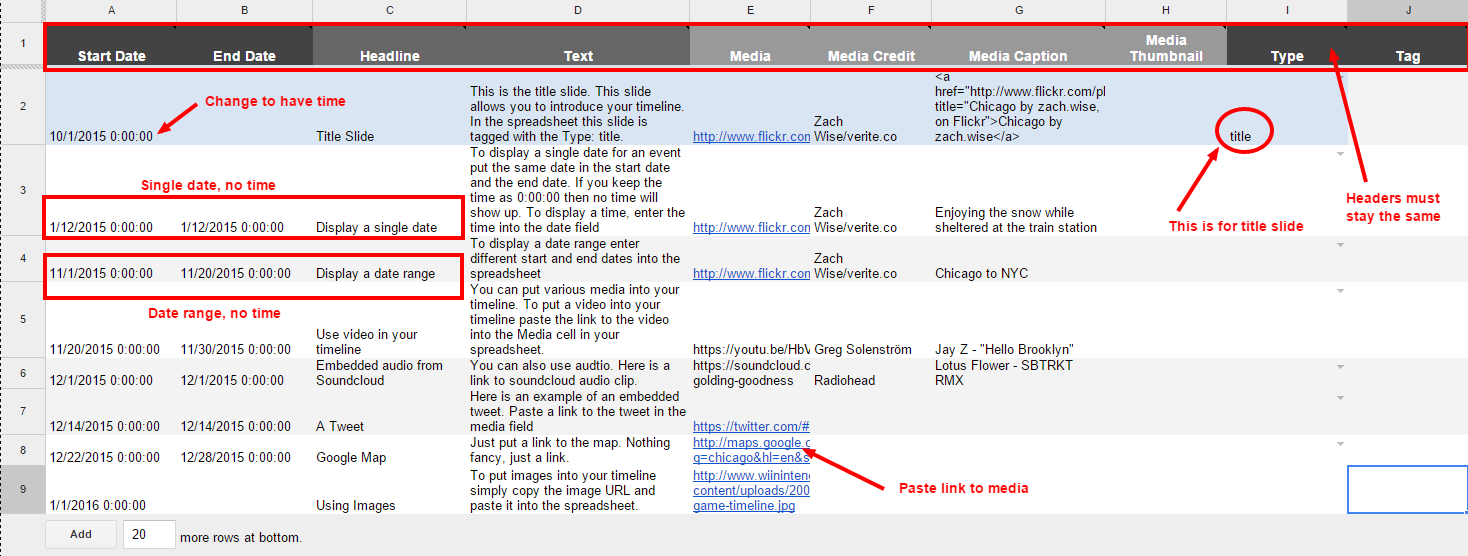
1. Click here to make a new spreadsheet for your timeline: Timeline Template**Do not change column headers. Do not remove any columns. Make sure there are no blank rows in between data. You can add additional rows at the bottom of the sheet.
2.Fill out the spreadsheet for your timeline. I put descriptions of what goes in each cell in the timeline template to give you guidance. The image below also highlights key areas. One of the great features is that the dates do not have to be entered in chronological order, the script will reorder your dates accordingly!
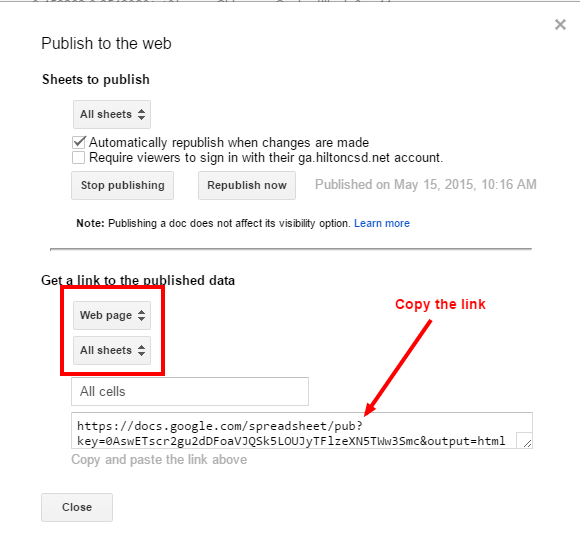
3. When you are all done and want your timeline to be live. Publish your spreadsheet to the web. Go to File > Publish to the web.
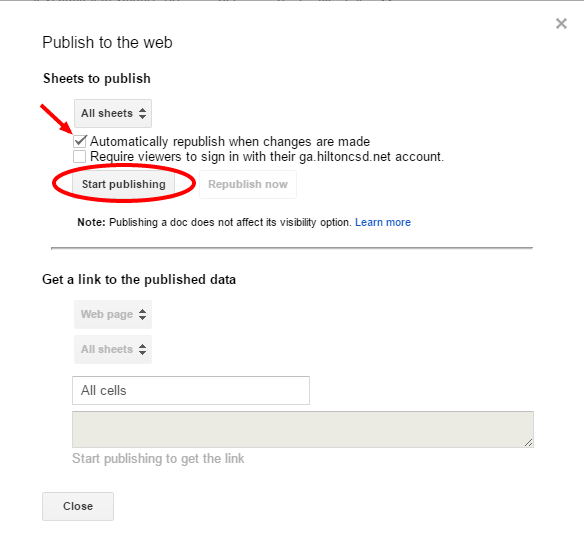
Copy the URL
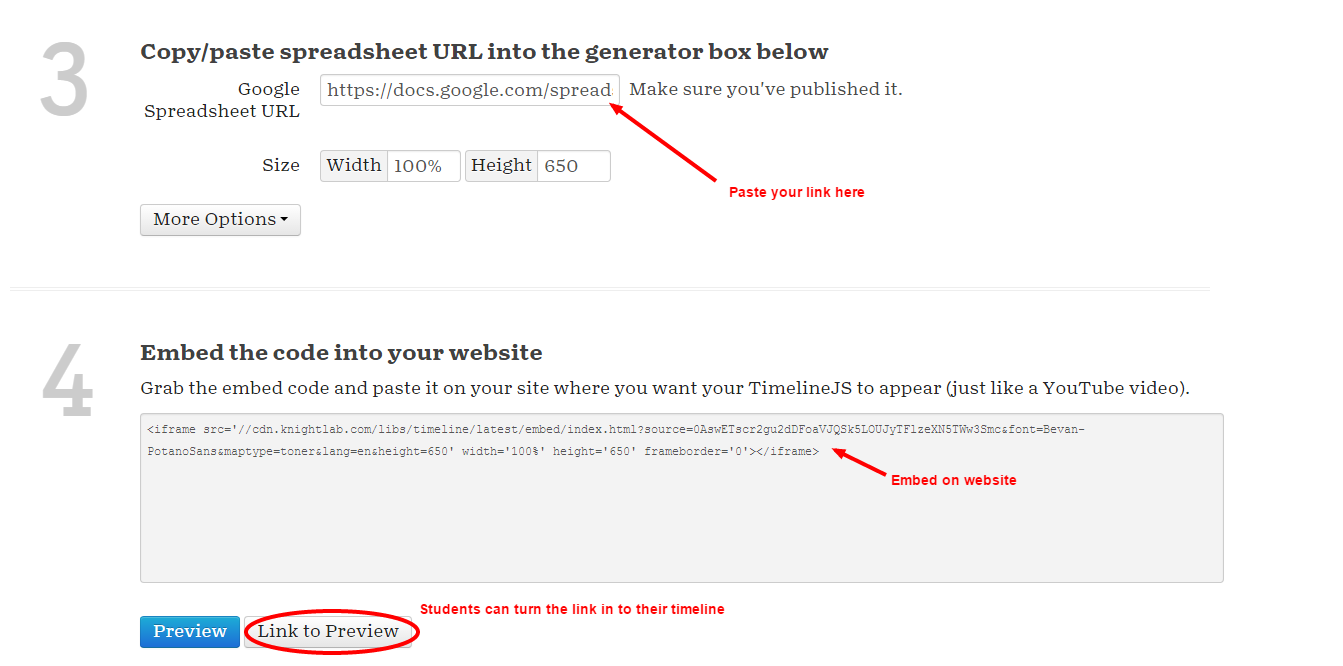
4. Go to this site: http://timeline.knightlab.com/#make
Scroll down to #3. Paste in your URL. Get your link or embed your video
Video tutorial on Timeline JS
Another great timeline tool is Hstry. These timelines move vertically down the page and allow you to use media as well. One of the key differences is that you have to make an account for this one.
Knightlabs also provides a StoryMap. The StoryMap is a bit more complicated. It involves making extra large images and navigating around them. But, it's a great tool. Stay tuned for a how to on how to make a StoryMap
Check out this character map using StoryMap


No comments:
Post a Comment